Table of Contents
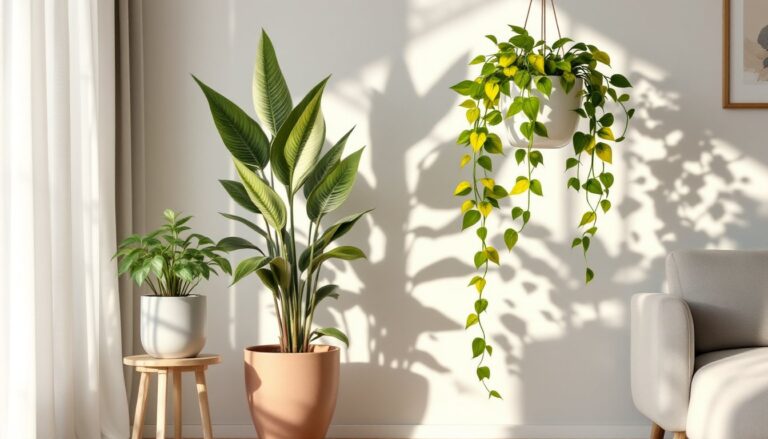
ToggleThat awkward gap between your kitchen cabinets and the ceiling? It’s a dust magnet, a dead zone, and, if you play it right, one of the easiest places to add personality to your kitchen without breaking out the drill. Fake plants have become the go-to solution for homeowners who want greenery without the watering schedule or the worry of low light killing off yet another fern. Unlike live plants that struggle in the dim, warm conditions above cabinets, quality artificial greenery stays vibrant year-round and doesn’t drop leaves into your morning coffee. This guide walks through the practical steps to select, arrange, and maintain fake plants in that high-up real estate.
Key Takeaways
- Fake plants on top of kitchen cabinets solve the maintenance challenge of live plants while thriving in low-light, high-heat conditions without watering or pest concerns.
- Choose UV-resistant polyester or silk-blend fake plants with matte finishes and realistic texture to ensure they look convincing under kitchen lighting year-round.
- Arrange fake plants using asymmetry, odd-numbered groupings, and mixed plant types (trailing, upright, and filler) to create depth while maintaining 40–60% coverage to avoid clutter.
- Measure cabinet gaps (typically 6–18 inches) and select plants filling roughly two-thirds of vertical space—an 8-inch plant works well for a 12-inch gap.
- Dust fake plants every 4–6 weeks and perform deep cleaning every 3–4 months to prevent grease and dust buildup, which turns decorative arrangements dingy quickly.
- Pair fake plants with non-plant elements like baskets and ceramic bowls, and match container styles to your kitchen’s aesthetic (farmhouse, modern, or traditional) for a curated, professional look.
Why Fake Plants Are Perfect for Above-Cabinet Decor
The space on top of kitchen cabinets sits in a hostile zone for living plants. Heat rises from cooking, natural light is usually minimal, and access for watering or care requires a step ladder every time. Fake plants eliminate all three problems.
First, they don’t need light. Whether the kitchen has a single pendant or wall-to-wall skylights, artificial greenery looks the same. Second, there’s zero maintenance beyond occasional dusting. No watering means no risk of water stains on cabinet finishes or ceiling drywall. Third, they’re permanent. Homeowners looking for kitchen styling solutions often find that seasonal rotations or plant die-offs disrupt their design, fake plants stay consistent.
From a design standpoint, greenery softens the hard lines of cabinetry and fills vertical space without adding visual clutter. In kitchens with 8-foot ceilings, even a 12-inch gap above cabinets can feel unfinished. Plants, real or fake, bridge that gap and draw the eye upward, making the room feel more complete. In open-concept homes, the top of the cabinets is visible from living and dining areas, so what goes up there matters more than it did in closed-off kitchens of decades past.
Fake plants also sidestep the pest issues that come with soil and organic matter. Fungus gnats, spider mites, and the occasional fruit fly won’t breed in silk or plastic foliage. For homeowners in humid climates or homes with persistent pest pressure, that’s a real advantage.
Choosing the Right Fake Plants for Your Kitchen Cabinets
Not all fake plants are created equal. The difference between a convincing arrangement and a sad plastic bush comes down to material quality, scale, and realism.
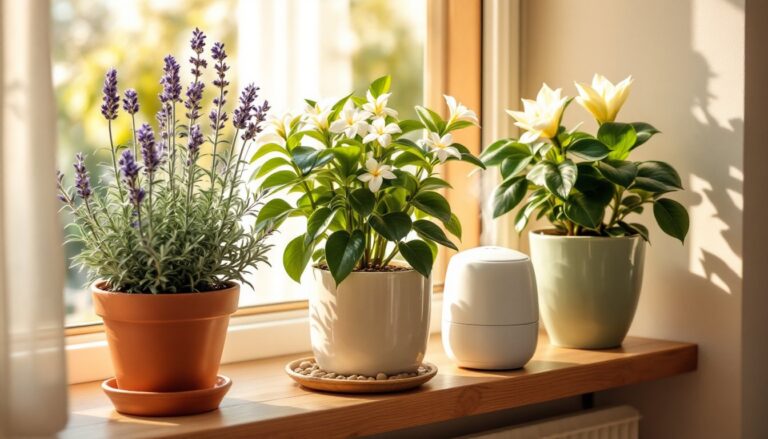
Material matters most. Look for plants made from UV-resistant polyester or silk blends rather than cheap plastic. The former hold color under kitchen lighting and don’t yellow over time. Run your hand over the leaves, if they feel stiff or waxy, they’ll look fake from across the room. Quality faux plants have slight texture variation, matte finishes, and even “imperfections” like color gradients that mimic real foliage.
Scale is the second consideration. Measure the vertical clearance between the cabinet top and the ceiling. In most homes, this ranges from 6 to 18 inches. Plants that are too tall will bend against the ceiling: too short and they disappear. As a rule, choose plants that fill roughly two-thirds of the vertical space. For a 12-inch gap, an 8-inch-tall plant in a 2-inch pot works well.
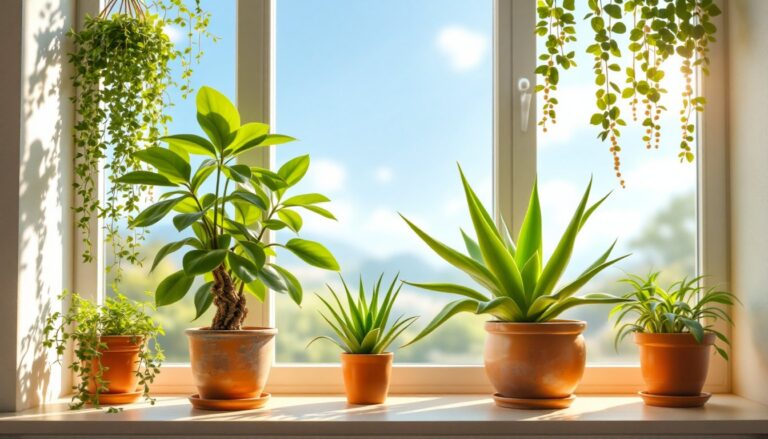
Best Plant Types and Sizes
Certain plant styles work better than others in the narrow, horizontal space above cabinets.
Trailing plants like pothos, ivy, or string of pearls (in faux form) add movement and soften cabinet edges. These work especially well if the vines drape slightly over the front edge. Keep trailing stems to 12–18 inches in length, longer looks messy, shorter loses the effect.
Upright plants such as succulents, snake plants, or eucalyptus stems provide vertical interest without sprawl. These are best for minimalist or modern kitchens. Choose stems or pots that don’t exceed 10–12 inches in total height for standard cabinet clearances.
Filler greenery like boxwood balls, ferns, or mixed foliage bundles fill space quickly and pair well with other decorative objects (baskets, trays, vintage tins). Opt for 6–10 inch diameter clusters.
Avoid overly seasonal plants unless you’re committed to swapping them out. A faux poinsettia looks odd in July. Stick with evergreen varieties that hold up year-round. And skip anything with glitter, neon colors, or overly “crafty” embellishments, those scream fake from a mile away.
Step-by-Step Guide to Arranging Fake Plants on Top of Cabinets
Before placing a single stem, clean the cabinet tops thoroughly. Grease, dust, and grime accumulate fast in kitchens. Wipe down the surface with a degreasing cleaner or a mix of warm water and dish soap. Let it dry completely. If the cabinet tops are unfinished particleboard (common in builder-grade homes), consider lining them with shelf liner or contact paper for easier future cleaning and to protect the surface.
Here’s the arrangement process:
-
Measure the cabinet span. Use a tape measure to note the length of each cabinet section. This helps determine how many plants or groupings you’ll need. A standard 36-inch upper cabinet can hold 2–3 small arrangements: a 48-inch run might take 3–5 pieces depending on size.
-
Establish anchor points. Start with your largest or tallest plant. Place it slightly off-center rather than dead-center for a more natural look. Interior designers often reference arrangement techniques that emphasize asymmetry over rigid symmetry.
-
Layer in filler pieces. Add smaller plants, baskets, or decorative objects around the anchor. Vary heights and textures. If using multiple plants, group them in odd numbers (3, 5, 7), it’s a design trick that feels more organic than pairs.
-
Mind the sightlines. Step back and view the arrangement from the kitchen entryway, the dining area, and any other common angles. Adjust placement so nothing blocks light fixtures or looks crowded from key viewpoints.
-
Secure if needed. Lightweight pots can tip during cleaning or if bumped by a ladder. Use museum putty or adhesive mounting squares on the pot base to anchor arrangements in place. This is especially important in homes with pets, kids, or ceiling fans that create air currents.
-
Leave breathing room. Don’t pack every inch. Negative space prevents the look from becoming cluttered. Aim for 40–60% coverage of the total cabinet top area.
Styling Tips for a Professional Look
Even high-quality fake plants can look staged if they’re arranged without thought. Here’s how to elevate the design.
Mix plant types. Combining trailing, upright, and filler plants creates depth. A lone succulent in a pot looks like an afterthought: a succulent paired with a trailing pothos and a small fern cluster looks intentional.
Incorporate non-plant elements. Baskets, wooden crates, ceramic bowls, or vintage kitchen tools break up the greenery and add texture. A woven basket with a faux fern inside feels more curated than a plastic pot sitting solo. Just avoid overcrowding, each object should have space to be seen.
Match the kitchen’s style. In a farmhouse kitchen, use galvanized metal containers, distressed wood boxes, or wire baskets. In a modern space, stick with clean-lined ceramic pots in white, black, or concrete finishes. For traditional kitchens, urns, brass planters, or classic terracotta work well.
Adjust for cabinet color. Dark cabinets (espresso, navy, charcoal) pair well with lighter greenery and pots to create contrast. White or light wood cabinets can handle darker foliage and richer container finishes without looking heavy.
Avoid uniformity. Lining up identical plants at identical intervals looks like a showroom display. Stagger placement, vary pot styles, and alternate heights. If you have a long cabinet run, create 2–3 distinct groupings rather than one continuous line.
Consider lighting. If you have under-cabinet lighting or recessed ceiling lights, be mindful of shadows. Plants with dense foliage can cast heavy shadows on the cabinet tops: lighter, airier greenery diffuses light more gracefully. In kitchens with limited natural light, those interested in decorating ideas often recommend lighter-colored plants to prevent the space from feeling too dark.
Cleaning and Maintaining Fake Plants in High Spaces
Fake plants don’t need water, but they do collect dust, grease, and airborne particles, especially in a kitchen. Neglected artificial greenery turns from decorative to dingy fast.
Frequency: Dust fake plants every 4–6 weeks in a typical kitchen. If you fry food frequently or have poor ventilation, bump that to every 2–3 weeks. Grease buildup is the enemy: it attracts more dust and creates a sticky film that’s tough to remove later.
Tools: Keep a microfiber duster or extendable dusting wand handy. For plants with delicate leaves, a soft paintbrush works well to get into crevices. A handheld vacuum with a brush attachment is effective for larger arrangements.
Deep cleaning: Every 3–4 months, take plants down and wash them. Fill a sink or basin with warm water and a few drops of dish soap. Swish the foliage gently, rinse with clean water, and shake off excess. Lay plants on a towel to air-dry completely before returning them to the cabinet tops. For plants that can’t be submerged (those with glued elements or foam cores), use a damp cloth to wipe each leaf.
Access: Use a sturdy step ladder or step stool, never stand on chairs or countertops. If the cabinets are taller than 8 feet, consider a two-step folding ladder for safe reach. Wear dust masks if you’re sensitive to dust or have allergies: the top of cabinets can harbor surprising amounts of debris.
Refresh as needed. Even quality fake plants fade or wear out over time. If leaves start to look yellowed, frayed, or flattened, replace them. Most faux plants cost $10–$40 depending on size and quality, making replacement affordable every few years.
Conclusion
Styling the space above kitchen cabinets with fake plants is one of the simplest ways to finish a room without major expense or skill. Choose quality materials, measure the space, arrange with intention, and keep up with occasional cleaning. The result is a polished, lived-in look that doesn’t demand a watering can or a green thumb.